Despite my silence over the past eight months (awakened by my cousin, who "complained" that I never update the blog), things have been progressing, albeit on a variety of different projects here at Building a Better Bungalow.
When we last left you, I was in the process of sanding down the vanity in the 2nd floor bathroom. After much sweat and sanding, I got the whole thing stripped down, and then I got to staining it. I'd never truly stained anything before in my life -- just painted -- and aside from an occasional over-absorption in some areas (which I then quickly buffed out and restained to match as best as I could), I was pleased with the final result.
I then switched out the drawer knobs for pulls, so I had to fill and stain the knob holes and re-drill holes for the pulls. This was a bit more challenging, but I made it through just fine. After all that was finished up, we installed the new sink/counter and new faucets, and now we have two working sinks upstairs (which we did not have prior to the renovation)! It's great to have water pressure in both sinks...apparently the waterfall faucets that the previous owner had installed must have been corroded to hell and back inside, because they were non-functional, for the most part. I was happy that new faucets solved the problem that started us down this road to begin with.
After the sinks became functional again, it was spring-time, and that put this project on hold -- waiting for us to select new light fixtures, new mirrors and get an electrician out to move the light fixtures to where we want them. No more recessed lights, and a center-room light, will be nice! But that will come later this fall, hopefully.
Since spring, obviously, it's been gardening time -- my vegetables have been doing well despite the drought conditions, but I keep them very well-watered. I barely water my perennial garden, and fortunately, they're mostly natives and drought-tolerant, so they're actually doing well, although the ultra-warm spring we had really threw off their bloom schedules quite a bit.
I had hoped to get the backyard in better shape -- get new concrete laid in the back and for the sidewalks, dig up the patio pavers that were the base for the old hot tub and move them to a more functional spot, and plant grass where the hot tub formerly was.
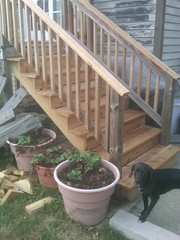
However, our deck, which had been poorly constructed and maintained by the previous owner (and then not maintained very well by us, either, unfortunately), decided to crap out. Several of the stair treads warped tremendously and popped their screws, making for a quite dangerous situation. I had hoped to put off renovating the deck for another year or two in order to totally demolish, rebuild and expand it, but there was no way to put it off.
I decided to pull all the surface decking off (treads, risers and decking) and replace it, because it was heavily weathered and installed incorrectly in many instances (cupped upward instead of downward). Furthermore, the screws that the PO used clearly were not the right screws, as they'd corroded and rusted, which is what started much of the problems.
I considered composite decking, but at the end of the day went with cedar. My parents just had a full composite front porch put in, and I don't really care for the look all that much. Plus, I'm confident that I can take better care of cedar than composite, so I went with the cedar.
I also decided I'd replace the balusters and handrails, so basically I was stripping the deck down to the structural pieces, which were in pretty solid shape overall. I began with the handrails and balusters, and replacing those was surprisingly simple.
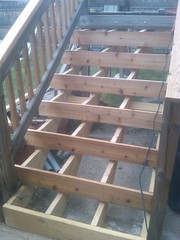
That having worked smoothly, I confidently moved on to the stairs, and that's where I stand now. You see, one of the reasons the stairs warped and popped loose was that the idiots who installed them used thicker boards for the treads, but only two stair stringers across about 38 inches. None in the middle at all. In reality, we're lucky we never busted through the center of the stairs.
That meant I needed to add stair stringers, and that's when the fun began. Since I had to add two stringers, I decided I would just get rid of the original stringers as well in order to fix the stair run -- another mistake by the original installer, which gave us a bottom step that was approximately 10 inches off the sidewalk (while the other steps were "standard"). For several years, we've had a limestone step up against our stairs in order to "add" a step. No longer will that be necessary.
Now, little did I know that building stair stringers would be an ultra complicated process. But finally, yesterday, I got the third and fourth stringers secured to the deck. There were several issues that came up along the way, most of them involving the poor design of the original deck, which would not accept any standard style stringer attachment.
So, my reinforced stringers are cut and installed, and they are close to level, though I'll need to shim them here and there in order to get the treads screwed down right.
Then, it's on to replacing the decking itself, and trying to figure out why the PO spaced the joists in some erratic pattern (20 inches apart here, 12 there, no rhyme or reason to it). I'll probably end up having to pull down the joists and either move or replace them as well.
Once again, fixing other people's mistakes. I don't have any pictures currently, but will try to be better about taking some or at least uploading the ones I have on my phone to Flickr in order to share them here.
For now, here's hoping I don't go too long without posting again. Or else my cousin will complain. :)